Friday, December 31, 2010

The first F00d P0rn of the New Year

This was supposed to be a Strawberry Layer Cake. However, as I had frozen cherries, I decided to adapt it to what I had on hand. This cake has three layers and was very labor intensive to produce. The ingredients needed to be blended together in three separate bowls. I made huge mess in my kitchen and got cake flour (this stuff isn't cheap) on the floor, the counters and myself. I cleaned up my kitchen as the wonderful aroma of butter, sugar, vanilla and cherries filled my home.

After allowing the cake layers to cool completely, I made the icing as well as a huge mess in my kitchen (the second time today no less). This time I got confectioners sugar all over the place as the icing required six cups! Way to get a sugar high, eh followers?

I had a lot of trouble getting the icing to completely cover the cake. I had to keep spreading and smoothing it. Finally, I gave up, left well enough alone and put it in my layer cake carrier to present at my friend's New Years brunch.

I just got back from the brunch and I am VERY happy to report that this cake was a smashing success and almost all eaten. Here is some of the feedback I received as people enjoyed my creation......

"Rachel? Keep cooking....!"

"Amazing....!"

"So beautiful....!

It was all worth it. How long it took the create it. The resulting backache. The trashed kitchen. Me wearing flour and confectioners sugar (I even found some in my hair last night).

Happy New Year's, dear followers. Let's make 2011 delicious!

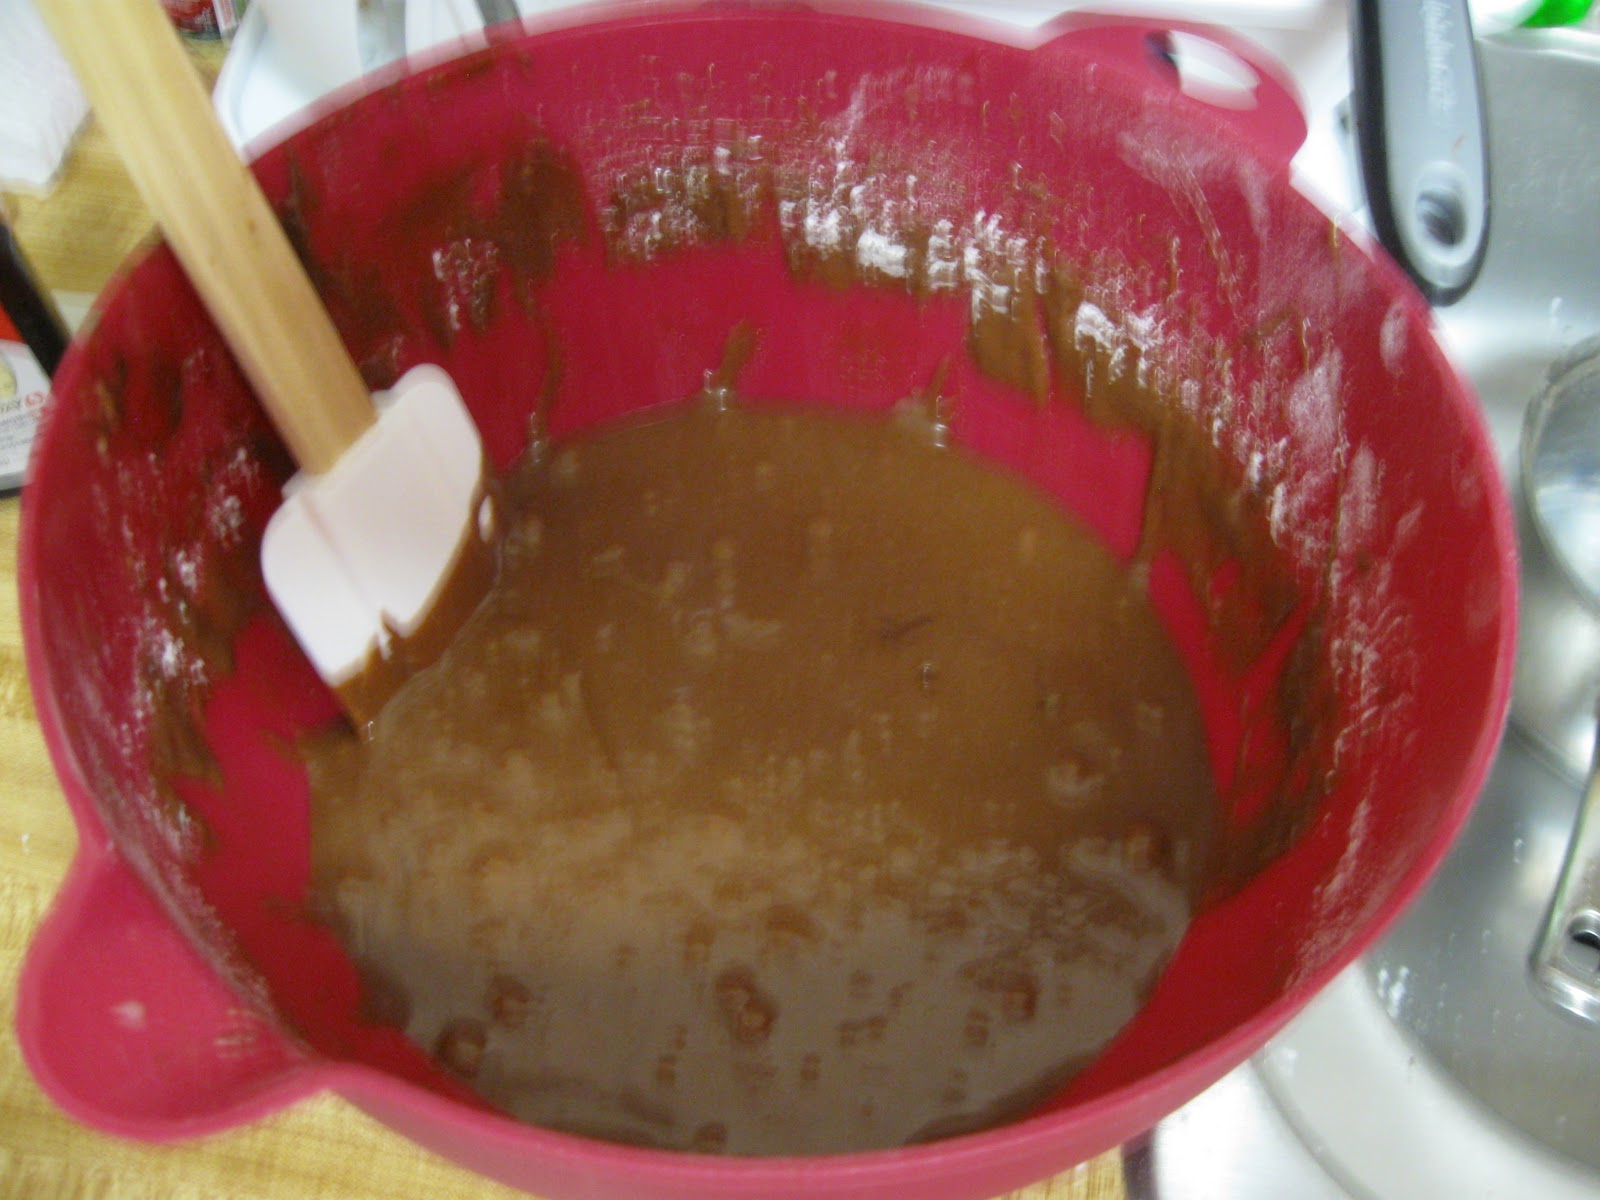
So pink and pretty! Cherry cake batter.

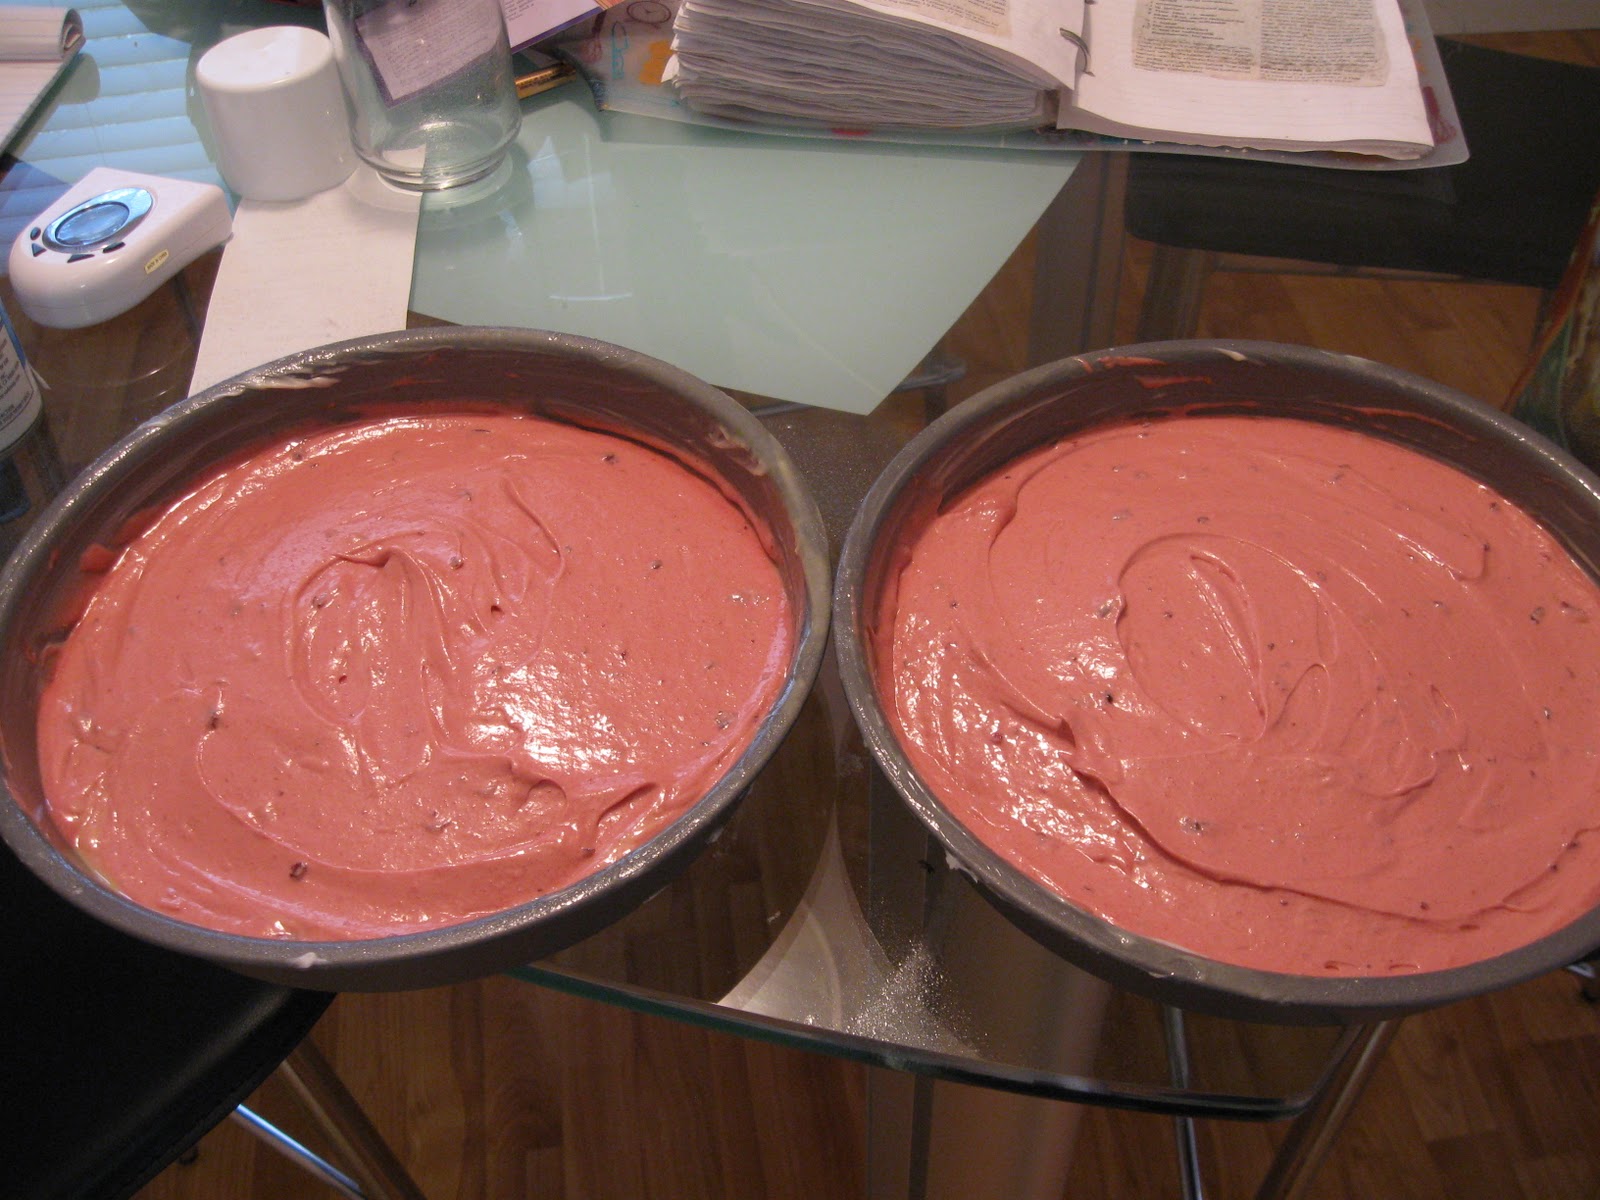
 Cake layers ready for the oven

Two out of three cake layers cooling on the table. One of them is on the plate of my layer cake carrier. I have them all set up for easy assembly once I make the icing.

 Assembling the cake and having a lot of trouble doing it :-(
Cherry triple layer cake. Finished! My back hurts :-(


This cake is almost all gone because we are all enjoying it!

Slice of cake on plate

Tuesday, December 28, 2010

Who needs to go to the local burger place?

......When you can create this level of yumminess in your own kitchen both economically and healthfully? My creation tonight was sirloin-portobello mushroom burgers. I set off my smoke alarm making these but the result was well worth it and incredibly delicious.

 Ready to go into the broiler!


All finished!

Plated with Swiss cheese on top with dollops of ketchup and mustard. 

Monday, December 27, 2010

Love lasagne? Dislike the work and mess?

Then toil no more, dear followers. This recipe is for YOU. This recipe has the perfect lasagne taste without all the work and mess. Introducing.....Baked Fettucine. This was adapted from a recipe I found online. Here it is.....

Ingredients
12 ounces Fettucine
1 pound lean ground beef
2 tablespoons butter
1/2 cup parmesan
2 cups mozerella
2 cups cottage cheese
24 ounce jar garden style pasta sauce

Instructions.....
1. Preheat oven to 400
2. Line three quart baking pan with foil, dull side up.  Spray with non stick cooking spray. Set aside.
3. Brown your meat until no longer pink. Add pasta sauce. Cook until bubbling.
4. While you are doing your meat, cook pasta, according to package directions.
5. Drain pasta. Place back in pot. Add butter and 1/4 cup parmesan, toss to coat well.
6. Place pasta mixture in prepared pan.
7. Spoon cottage cheese over the top of pasta.
8. Pour sauce/meat mixture over pasta.
9. Top with remaining parmasen and two cups mozerella.
10. Cover pan with foil, dull side down.
11. Bake for 30 minutes.
12.  Remove foil and bake for 15 more minutes
13. Take out of oven, and allow to stand for 10 minutes before serving
14. Resist urge to charge everyone at the dinner table 16.95
15. ENJOY! Garlic bread is a must

Here are the results.....!

 Baked fettucine after I took off the foil, before putting it back in the oven for 15 more minutes.


Delicious bubbly goodness on the kitchen counter.

Baked fettucine plated with Texas toast.

Sunday, December 26, 2010

A treat that wound up in the trash

As I have been on a baking spree lately, I wanted to try a different treat. Armed with my recipe for chocolate rice pudding, I set to work. Unfortunately, this one didn't work. It was labor intensive, messy and wound up in the trash. I am not sure if I will try this again. Right now, I am really irritated because I wasted two cans of evaporated milk and the last of my cocoa for something that didn't work.

Me holding a handful of frozen cherries with the juice dripping all over my fingers.  This had pureed cherries in it.

Another shot of me holding the cherries.

Chocolate rice pudding before it wound up in the trash. 

Thursday, December 23, 2010

I took one look at the traffic and decided to spend the day creating

After sleeping until almost 11:30 and taking one look at the traffic outside, I decided to spend the day creating for tomorrow's Christmas Eve party. Today's creation? Chocolate cupcakes with milk chocolate icing.

I have a confession to make followers: I misread the recipe for icing. It called for 1/4 cup milk and I put in 1/2 cup milk. This resulted in a thinner but still delicious icing. To compensate for this mistake, I first spread each cupcake with a thin layer of icing allowed it to set and then put on another layer. The icing also thickened upon standing. While it took me a lot longer to ice these cupcakes, the result was still yummy. I had one of them for a snack with a small glass of ice cold (skim) milk.

Now, if you'll excuse me, it's time for me to hit the gym for an intense treadmill workout followed by kickboxing. Something has to keep this F00d P0rnographer looking like a hottie while she creates and eats these delicious things!


 Bowl of milk chocolate icing

 Chocolate cupcakes with milk chocolate icing on a red tray

One dozen chocolate cupcakes with milk chocolate icing presented on white cupcake tray

Wednesday, December 22, 2010

It's a continuing series....

Yes, you guessed it! More fun with leftovers. This one came from the spiced pot roast I made the other day. This recipe produced a lot of stock and had tomatoes, onions and kidney beans. I decided to form the leftovers into a delicious soup. It was very easy. First, I cut the remaining roast into chunks, then I added it to the stock, brought it to a boil, then covered it allowed it to simmer for about 10 minutes. Then, I added in three cups of cooked brown basmati rice, brought it to a boil (again), then covered and allowed it to simmer for about 20 more minutes. The result? A delicious soup perfect for this chilly night.

A delicious beef and rice soup I created out of leftover spiced pot roast

Saturday, December 18, 2010

I tried two new things today

I decided to try something different with my new recipe for spiced pot roast. I set the Crockpot up last night, allowing the roast to cook overnight. After it was finished, I allowed it to cool to room temperature and put it in the refrigerator so the flavors could meld for a few hours before dinner. I will definitely make pot roast like this from now on. Not only was the flavor amazing,  allowing it to sit for a few hours allowed me to easily skim the fat off the top of the gravy.

My big culinary achievement of the day, however was sour cream-cheddar skillet cornbread. I tried to make this last week, set off my smoke alarm NINE times and it wound up in the trash. I think this was because I tried to do it in a cake pan, when the recipe called for a cast iron skillet (which I didn't own at the time). The day after this disaster, I went out and bought one.  I was able to get it right, despite missing one egg. The recipe called for three eggs and I only had two. The result was moist, delicious, mouthwatering and a wonderful side for my spiced pot roast. The best part? I didn't set off my smoke alarm.


Sour cream-cheddar skillet cornbread fresh out of the oven

Spiced pot roast served over rice pilaf with a side of sour cream-cheddar skillet cornbread

Friday, December 17, 2010

Can you tell I enjoy having fun with my leftovers?

I came home from the gym and of course, I was famished. While looking at what I had in the refrigerator, a wonderful idea came to me: beef stew.

I took the last piece of pot roast I had and cut it into chunks. In a bowl, I put the last bit of rice pilaf I had, then the beef and finally, the gravy that went with the pot roast. I microwaved it for about four minutes and viola, a delicious lunch AND a way to use up leftovers.

 Beef stew I threw together from leftovers

In this picture, you can see the rice pilaf I threw in there

Thursday, December 16, 2010

A labor intensive cupcake recipe with a wonderful result

I had only been up for about an hour when it began to snow. Thank heavens I went to the store yesterday so I had everything I needed for a fun snow day activity. I am planning to go to a holiday party tomorrow night (weather permitting) and I wanted to try this recipe for carrot cupcakes with cream cheese icing.

This recipe is labor intensive: it calls for 1 1/2 pounds of grated carrots, which I grated by hand as I prefer not to buy ready-cut vegetables. The batter was also thick and a bit hard to work with. I was a little concerned when I put these in the oven but my concerns soon melted away (and I hope the snow piling up outside will do the same very soon!) as the wonderful aromas of cinnamon and nutmeg filled the air.

When I took them out of the oven, they looked and smelled amazing. I couldn't wait to crown them with cream cheese icing.

After allowing them to cool, I made the cream cheese icing and iced the cupcakes. Like any good cook, I sampled my work. These are amazing and here is the result.


1 1/2 pounds of hand grated carrots


Carrot cupcake batter


Carrot cupcakes ready for the oven

Carrot cupcakes cooling on the table

 Cream cheese icing


One dozen carrot cupcakes in a cupcake pan

Carrot cupcakes frosted with cream cheese icing

Wednesday, December 15, 2010

A truly versatile cookie recipe

Don't be afraid to change ingredients in a recipe. I had a cookie recipe for chocolate chip-cherry-walnut cookies but I had dried apricots in my pantry, so I decided to substitute. These cookies are delicious and cooling on my kitchen table as I write this. Here is the original recipe:

1 cup plus 2 tablespoons all-purpose flour
1/2 teaspoon baking soda
8 tablespoons unsalted butter, melted
1/2 firmly packed light brown sugar
1 large egg
1/2 teaspoon vanilla extract
3/4 cup mini chocolate chips
1/2 cup chopped walnuts
1/2 cup dried cherries, coarsely chopped

1. Preheat oven to 375. Mist a 24-cup mini muffin tin with cooking spray. Combine flour abd baking soda in a bowl.

2. In a large mixing bowl, mix together butter and brown sugar. Add egg and vanilla and whisk until smooth. Add flour mixture and stir until just incorporated. Stir in chocolate chips, nuts and cherries.

3. Spoon cookie dough into each muffin cup until it just comes to the tops (these cookies don't rise much).

4. Bake until cookies are golden around the edges and just set in center, 10-12 minutes. Remove muffin tin from oven and allow to stand for five minutes before removing to cool completely.

Chocolate chip-apricot-walnut cookies ready for the oven

Chocolate chip-apricot-walnut cookies cooling on a dish towel.

Tuesday, December 14, 2010

Brown bagging your lunch doesn't have to be boring

Bringing your lunch to work and/or when you are out and about really makes a difference in your wallet and your waistline. Brown bagging it doesn't have to be boring and can be a fun, creative way to use leftovers. I was in downtown DC all day today and didn't want to eat overpriced, unhealthy fast food so I packed lunch.  I took some of the pot roast I made the other night and piled it onto an Asiago cheese roll from Panera with some mustard and a slice of  Swiss cheese. This was a delicious and gourmet tasting lunch for a fraction of what I would have paid if I had ordered it in a restaurant. If you really want to go all out with this creation, place it in the oven for a few minutes to brown the bread and melt the cheese. Heavenly!

Pot roast sandwich on Asiago cheese roll with mustard and Swiss cheese on foil.

Monday, December 13, 2010

Gourmet, delicious and ready in about 20 minutes

Good cooking does not have to require hours in the kitchen. This dish came together in about 20 minutes, was delicious and required about six ingredients. Now, put down the delivery menu and get yourself into the kitchen to prepare this delicious meal---chicken with tomatoes, raisins and apricots.


Simmering on the stove.....

On a plate with rice pilaf

Sunday, December 12, 2010

Sometimes my talent attracts unwanted attention

One time, I made a Brazilian chicken curry in my CrockPot. It was delicious and the leftovers lasted for several days. I packed some in a Tupperware and brought it to work one night. I was in the faculty break room microwaving it when in walks GeekBoy. This man had been pursuing me for months. I hated him from the start and was never nice to him, yet he persisted. He took one look at me and asked, "Hey Chef, what's cooking?"**. I answered him in one word, "Curry."

"Oh, that's really healthy. You are like a nutritionist!"**  Huh? What kind of line is that?

I got my food out of the microwave, walked up to him, stared him down, called him a freak** and left him standing there grinning that stupid grin, laughing that stupid laugh.

Here, followers is the creation that attracted this unwanted attention.

**These are direct quotes. I couldn't make this up if I tried.


Brazilian chicken curry in my CrockPot


Brazilian chicken curry presented in a white bowl (there is basmati rice under there, you just cannot see it)

Friday, December 10, 2010

Making Mexican food in my CrockPot


I love burritos and soft tacos and decided to experiment by making taco filling in my CrockPot.  This was made with  4 chicken breasts, one sliced onion, 1 cup salsa, 2 tablespoons vinegar, one teaspoon onion powder, 1/4 teaspoon cumin, 1/2 teaspoon chili powder, 1/2 teaspoon minced garlic and 1/2 teaspoon Tabasco sauce. Place the the onions in the CrockPot, arrange chicken breasts on top. Mix together sauce ingredients and pour over the chicken;  place clean dish towel over CrockPot to absorb moisture, place cover over dishtowel. Cook on low for about six hours then shred the chicken with two forks. Enjoy with a side of black beans and rice and resist the urge to charge your dinner guests $16.95. Ole'! 

Chicken taco filling in my CrockPot.

 Black beans simmering on the stove

Chicken soft taco on a whole wheat tortilla with a side of black beans and rice. 

The night I was craving Thai food

One night I was craving Thai food, so I decided to create my own. I call this Thai chicken-peanut noodles.   You could make this with ready-made peanut sauce but I mixed my own with ‎1/3 cup creamy peanut butter, 3 tablespoons soy sauce, 3 tablepoons vinegar, half a teaspoon minced garlic and half a teaspoon Asian spicy chili sauce.  This dish came together easily using whole wheat linguine, bell peppers and chicken breasts. The leftovers taste great cold, just like a cold noodle salad. I shared this creation with two friends and they loved it.


 Thai chicken peanut noodles

A brilliant combination

Peanut butter and banana is one of the best combinations. Now imagine it in cupcake form.


Banana cupcakes cooling on a dish towel

 One dozen banana cupcakes iced with peanut butter icing.


Peanut butter icing

These cookies are only for hardcore chocolate lovers

These double-chocolate iced cookies were the best cookies I have ever made. I made them a few months ago and I am dying for the opportunity to make them again. Be sure to have these with a cold glass of (skim) milk ;). My friend told me they also are good with coffee.


Bowl of melted chocolate---this was too beautiful not to share with all of you.


One dozen double chocolate iced cookies on a cookie sheet

Fun with a basic

Great cooking doesn't have to require fancy ingredients and/or  labor intensive recipes. You can create something truly crowd pleasing out of some really basic things. A great example of this are my wonderful parmesan rolls. This requires three ingredients: refrigerated crescent rolls, butter and parmesan cheese. I have been making these for years and everyone I have served them to loves them.

These are amazing and so easy to make. Melt some butter. Place some parmesan cheese in a small bowl. Carefully unwrap crescent rolls. Dip into melted butter, put some parmesan cheese on the butter. Roll into crescent shape, put more cheese on top. Brush with any leftover melted butter. Bake per instructions on package...these take about 20 minutes. I like to do them on a foil lined cookie sheet sprayed with Pam. Enjoy with entrees such as chicken cacciatore, pasta with meatsauce and chicken parmagiana.


Parmesan rolls fresh out of the oven.

Parmesan roll with chicken cacciatore.

This weather is perfect for F00d P0rn

I woke up this morning and set up my CrockPot to make a pot roast. Then, I wrapped up and headed to my normal Friday Zumba class. Imagine my surprise when I came out of the gym and discovered it was snowing. As I had the wherewithal to tuck my shopping list in my purse before leaving for the gym, I decided to stop at the grocery store on the way home. The driving conditions were terrifying. Even though there wasn't much snow, the cold weather made for slippery roads. My car skidded twice. I shopped for my groceries quickly, with chills up my spine and shaking hands.  I drove home slowly and saw two people lose control of their cars and slide onto the median. I made it home in one piece and thanked the driving gods for allowing me to get home safely. Once I calmed down and stopped shaking, I began to create. This weather is perfect for F00d P0rn.


Chocolate chip banana bread cooling on a dish towel. This didn't stay intact for long, I had to sample a piece after I put down my camera. It was warm, sweet and delicious!


Pot roast with half a sweet potato. This is one of my favorite things to make--I never get tired of it. I once made this for my father (he's a picky eater) and he loved this so much, he took TWO helpings.